We have prepared a comprehensive guide that will show you how to start training with a power meter the right way. A few simple steps will help you set the device up correctly and walk you through the first stages of training with one of the most effective tools for building cycling fitness.
If you are just beginning your journey with a power meter, this guide will take you through the entire process – from first powering up the device, through installation and calibration, all the way to your first rides and choosing a training plan.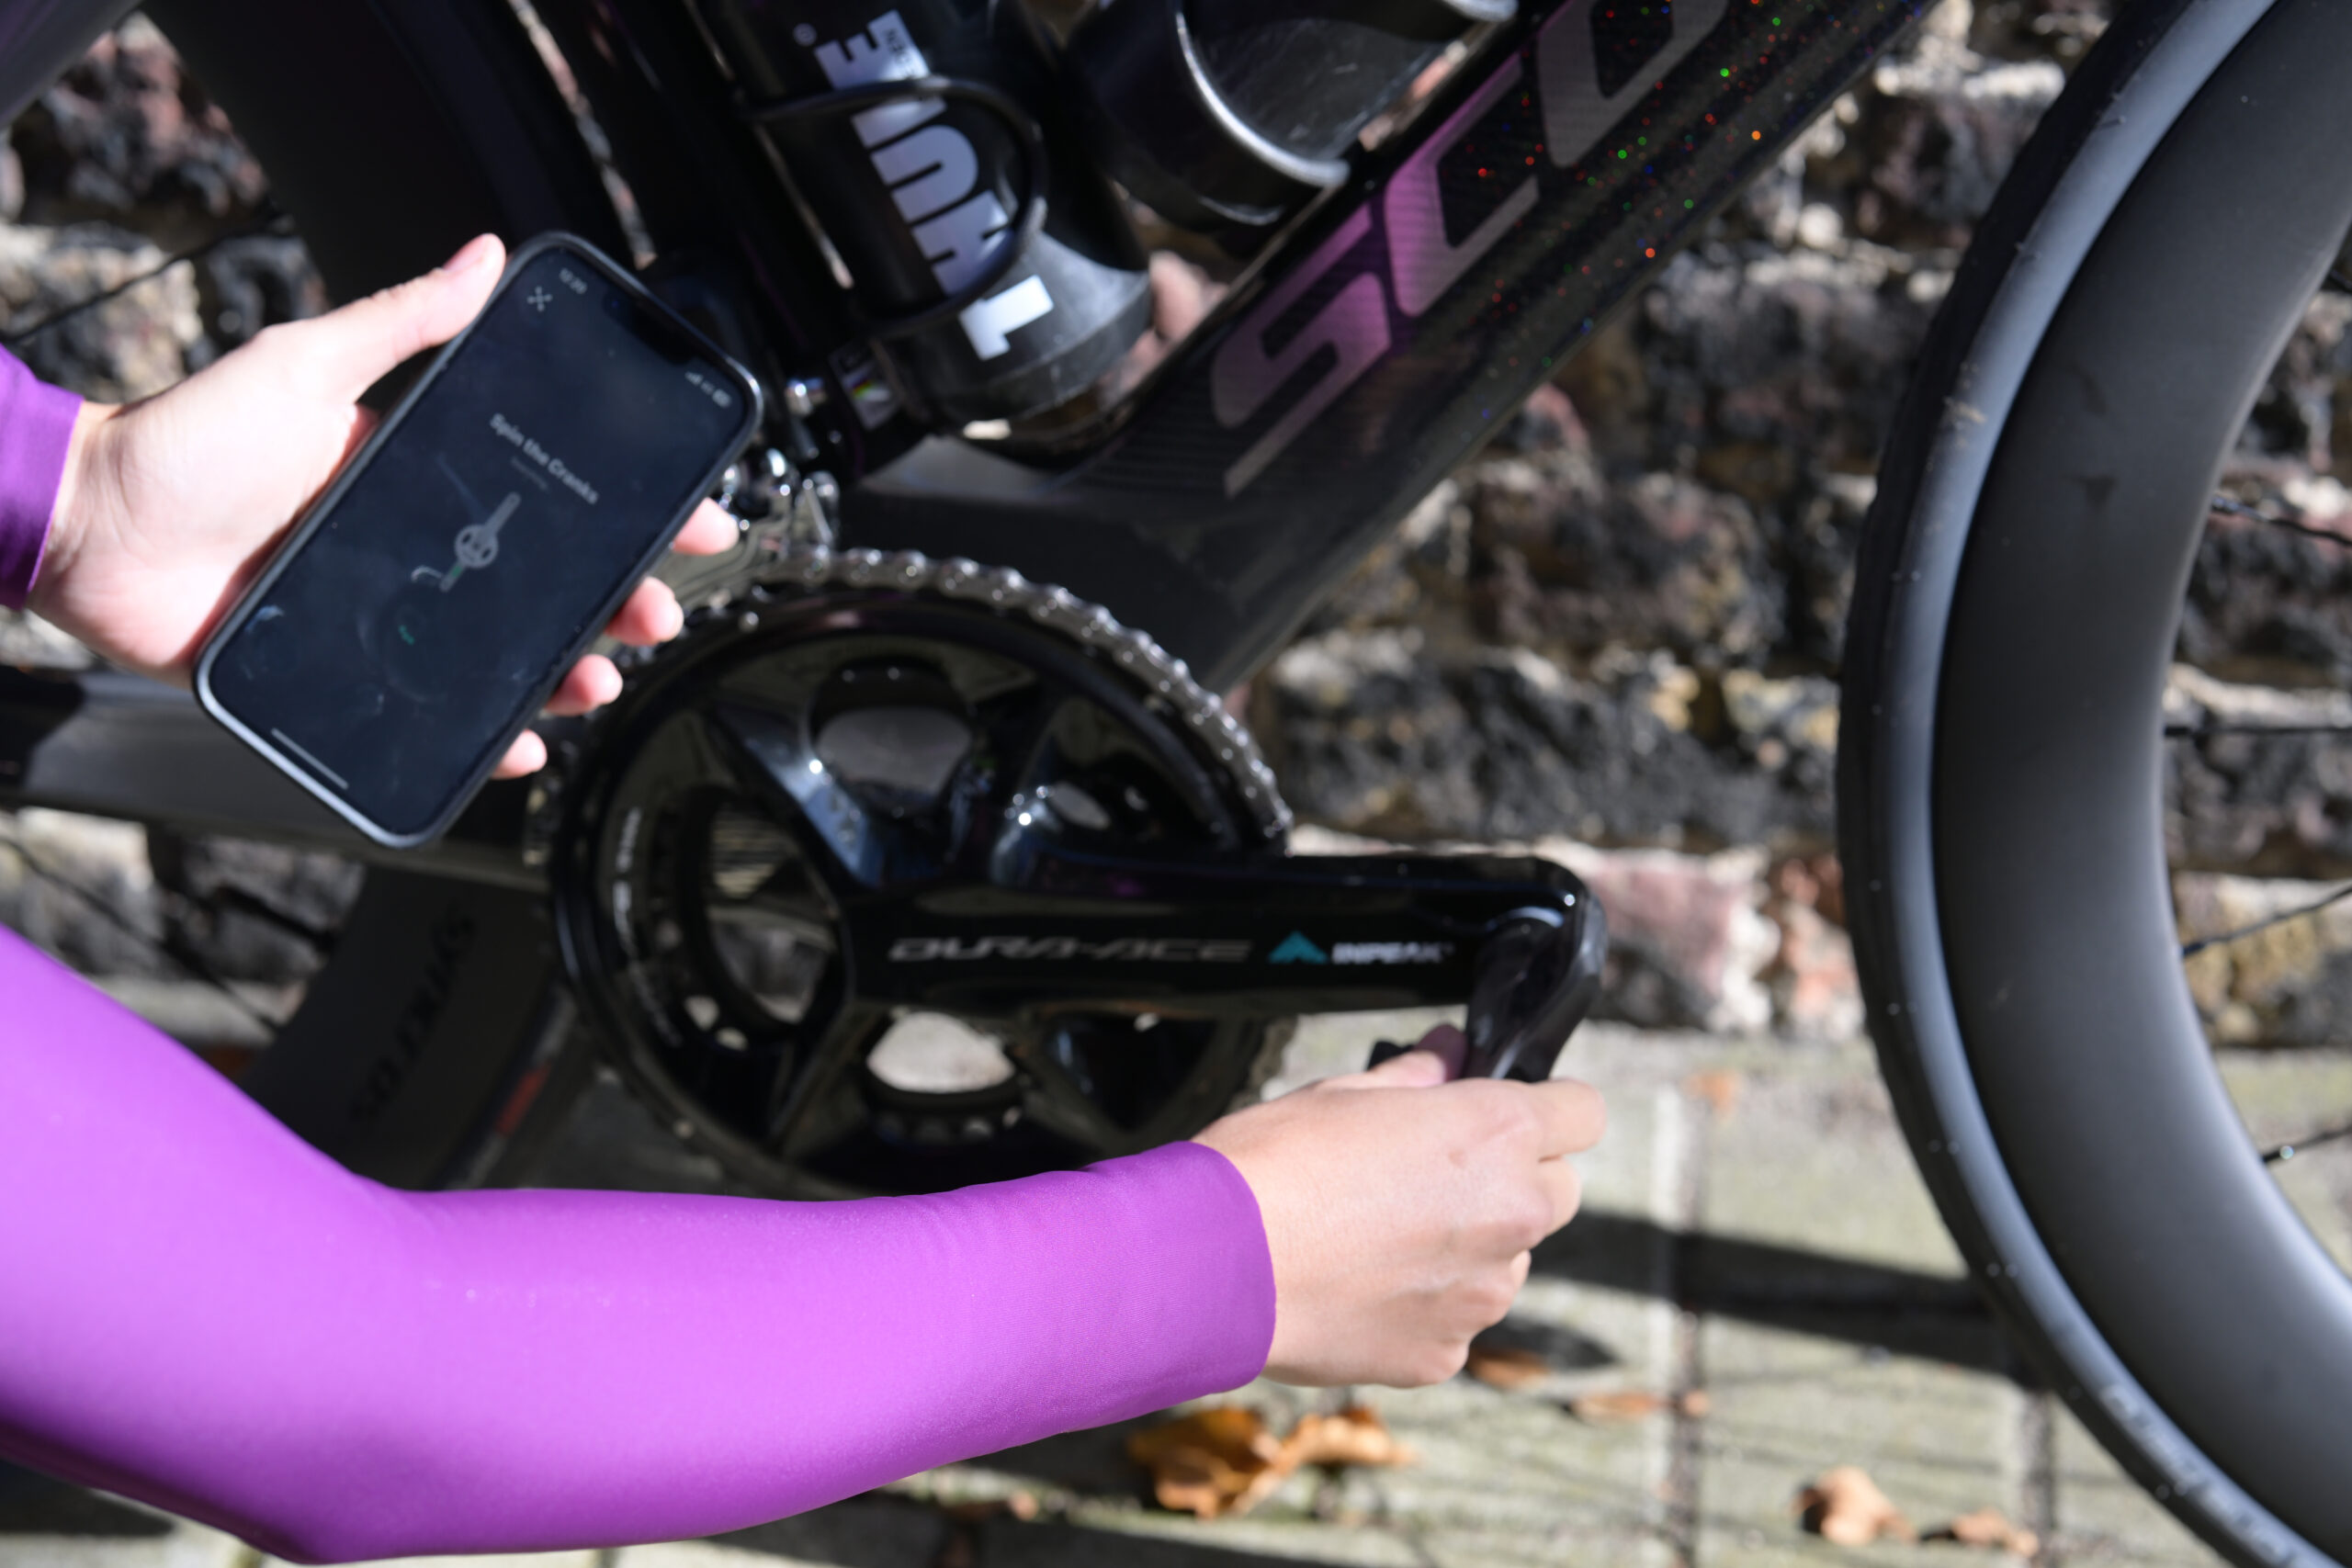
Step 1. Activate your power meter
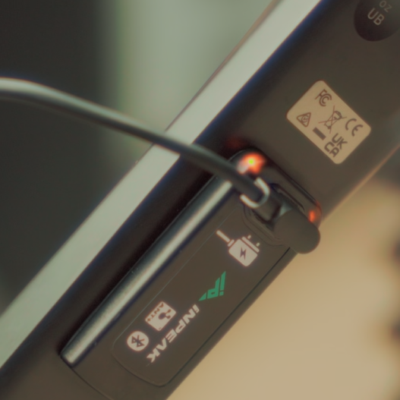
Powercrank-E (rechargeable version)
The power meter is in sleep mode. Thanks to this, it does not consume energy during storage and transport. To wake it up, briefly connect it to the charger using the magnetic cable included in the set. The device waking up will be signalled by flashing LEDs.
Powercrank (CR2032 battery version)
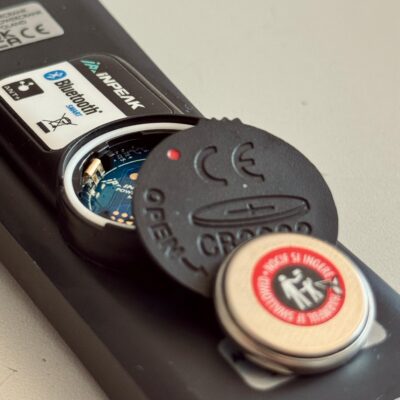
Insert the battery included in the packaging into the power meter. Remember to remove the protective sticker from it before installation. Pay attention to the correct orientation of the battery – the “+” should face upwards. Correctly closing the battery cover is also very important. The visible white rubber ring (o-ring) protects the electronics against moisture. Before closing, make sure it is properly seated. If the o-ring is folded or misaligned, there is a risk of water getting inside the device. Close the cover. The red markers should align with each other when the cover is inserted, then turn it clockwise. Finally, check that the cap is firmly secured.
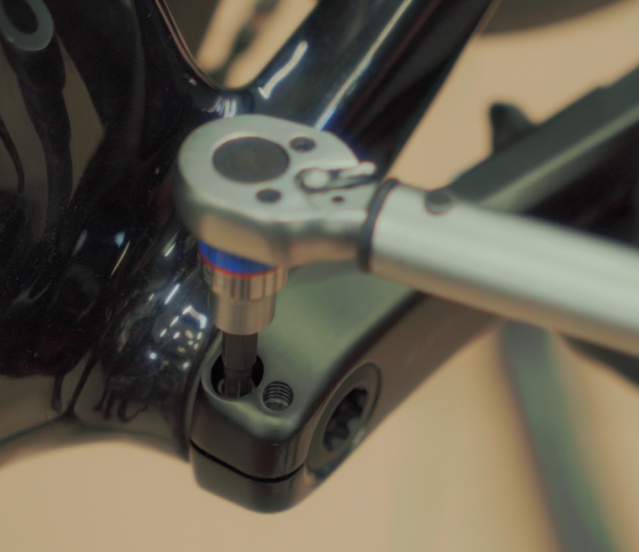
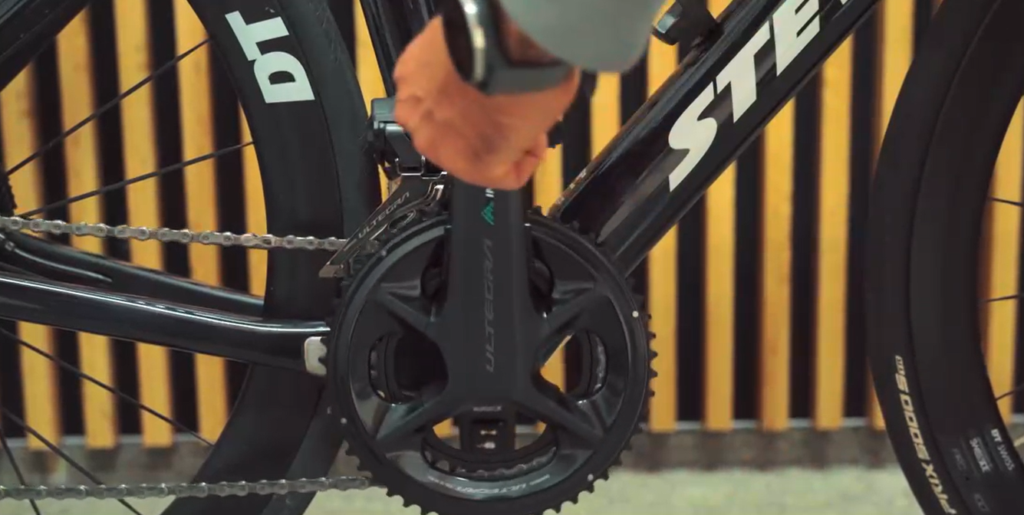
Step 2. Install the power meter correctly
Regardless of the power meter version you choose, correct installation is crucial. You will need a torque wrench with the appropriate range and a tool for tightening the plastic lock screw.
Fit the crank arm and tighten the plastic screw to a light resistance. The crank should rotate smoothly, with no noticeable play between the arm and the bottom bracket. Insert the plastic safety pin appropriately. It should be lowered and should not protrude beyond the outline of the crank arm. This is an additional safeguard protecting against the arm slipping off in the event of insufficient screw tightening.
Tighten the side crank bolts with a torque wrench in accordance with the manufacturer’s recommendations. Shimano recommends a tightening torque of 12–14 Nm. This value is very important for the proper functioning of the power meter. Tightening too loosely can affect the calibration result and increase the risk of the crank arm coming loose while riding. Tightening too tightly can damage the thread of the bolt or the crank.
Step 3. Calibrating the INPEAK power meter – how to do it correctly?
After the power meter has been installed correctly, you need to perform a calibration. You can do this using a compatible bike computer or the INPEAK Manager app.
Important: always perform the calibration with the crank completely unloaded. Do not press on the pedals and do not rest your legs against the cranks. For calibration, set the crank arms in a vertical position.
Calibration using a bike computer.
Make sure the power meter is active. Make a few revolutions of the crank – the flashing LEDs will confirm that it is working (LEDs are present only on the Powercrank-E model). On your computer, select the option to add a new power sensor. Once the device has been detected, check that the ANT+ number matches the number found on the power meter. After the devices are connected, set the crank arms in a vertical position. Do not clip into the pedals and do not rest your legs against the cranks or pedals. It is best to perform the calibration standing next to the bike. Then select the “Calibrate” function. Your computer will display a message confirming a successful calibration. The correct value should be “0” for single-sided power meters – Single, and 1010 for dual-sided power meters – TWIN2.

Calibration using the INPEAK app.
After logging into the app, connect to your power meter, just as with the computer, and select the “Calibrate” option. Before starting the procedure, set the crank arms vertically. Remember not to be clipped into the pedals and not to load the crank during calibration.
Which calibration values are correct?
After calibration, the computer or app will display the offset value (the zero value). This is a normal part of how the power meter works and allows you to verify that it is operating correctly.
Correct values for SINGLE power meters
For single-sided power meters, the correct calibration value usually falls within the range: from -3 to +3. The most commonly encountered value is 0. Small deviations from zero are completely normal and do not affect measurement accuracy.
Correct values for TWIN2 power meters
For dual-sided power meters, the correct calibration value is: 1010
If the value you obtain differs from those listed, check the meaning of the code in our FAQ or user manual and contact the support team.
The error table is shown below.
| Calibration value | Description |
|---|---|
| -3 to +3 | OK – POWERCRANK SINGLE |
| 1010 | OK – POWERCRANK TWIN2 |
| 25 | ERROR – incorrect crank position |
| 50 | ERROR – low battery |
| 75 | ERROR – sensor damage |
When should you calibrate again?
It is worth performing a calibration:
- before the first ride,
- after installing or removing the crank,
- after replacing the battery,
- after a large change in ambient temperature,
- when you notice unusual power readings.
Step 4. How to set up your computer’s screen for power-based training?
After calibration, it is worth configuring the appropriate data fields on the screens of your bike computer.
Training screen – for performing intervals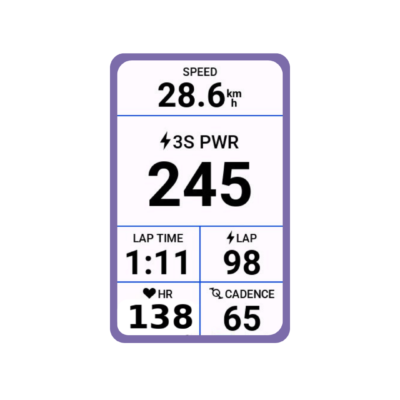
On the training screen it is worth placing:
- 3s averaged power – a more stable reading, without the “jumping” effect
- heart rate – it is good to correlate power values with heart rate, so you will know how your body responds to particular power values
- cadence – if you have cadence-based workouts to do, this is an essential element; riding at different cadences trains different qualities
- lap time – essential for completing interval tasks with a defined duration
- average lap power – important, because you will see whether you are “hitting” the target watts on the final repetitions
- Speed – completely irrelevant, because it depends on wind direction and gradient, but then who doesn’t like seeing 40–45 km/h on the computer during a tempo effort 😊
Recovery screen – between intervals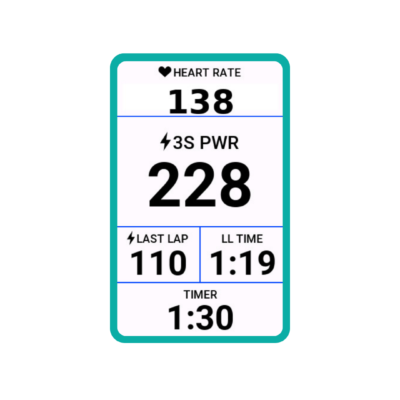
On the recovery screen it is worth placing:
- average power from the previous lap – this gives you immediate information on whether you “hit” the task
- previous lap time – you will know whether you completed the repetition in full
- current lap time – measures the rest time
- heart rate – for monitoring recovery; it will give you a signal as to whether the rest between intervals was sufficient, although you will certainly sometimes start the next intervals not fully recovered 😉
The remaining screens are entirely up to you. We like to have a screen with a summary of values such as: average power, normalized power, average speed, total distance, etc. If you race on the road, we recommend a screen showing only speed, distance and instantaneous power. During a race in the peloton, don’t look at the watts too often, because sometimes you may see values slightly above your limit and let a wheel go at a key moment. On the other hand, if you are planning gravel races with navigation along a route, set a power value on the map screen. You will be able to control your effort while still being sure you are following the correct track.
Step 5. Your first workouts with a power meter.
First, get to know your watts. For the first few workouts you don’t need to perform any tasks or intervals. Simply observe power, heart rate and your own perception of effort (RPE). Learn how your body responds to different levels of effort and learn to interpret the power meter’s readings.
Don’t focus solely on the numbers. At the beginning, the power values may seem unstable, even with 3-second averaging. This is completely normal. Over time your pedalling will become smoother, and your control of the power you generate more precise. Don’t attach too much importance to individual power values. It is far more important to observe the relationship between power, heart rate and your own sensations while riding.
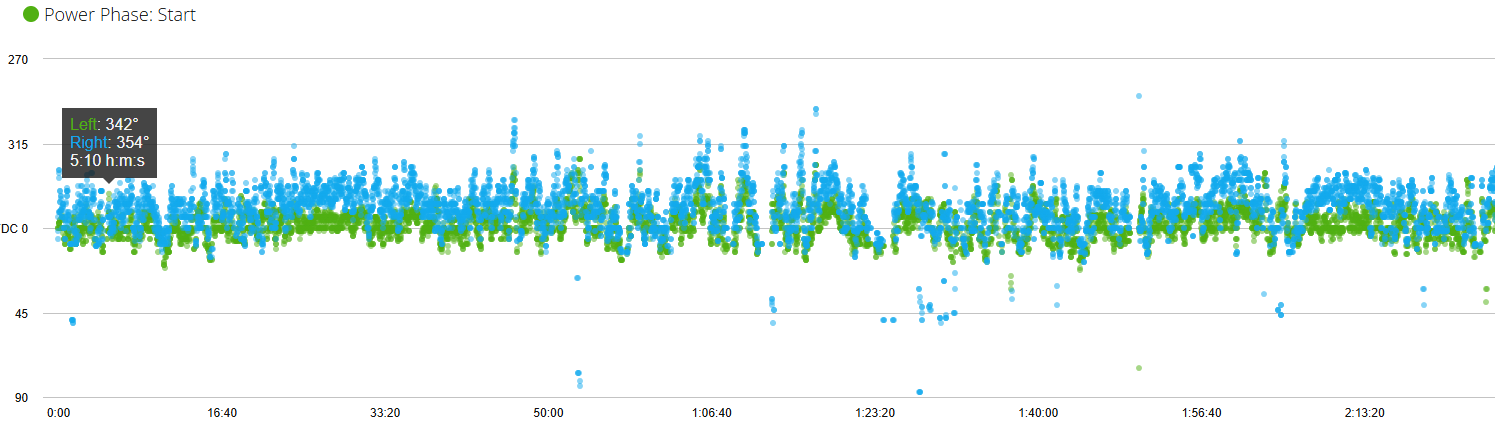
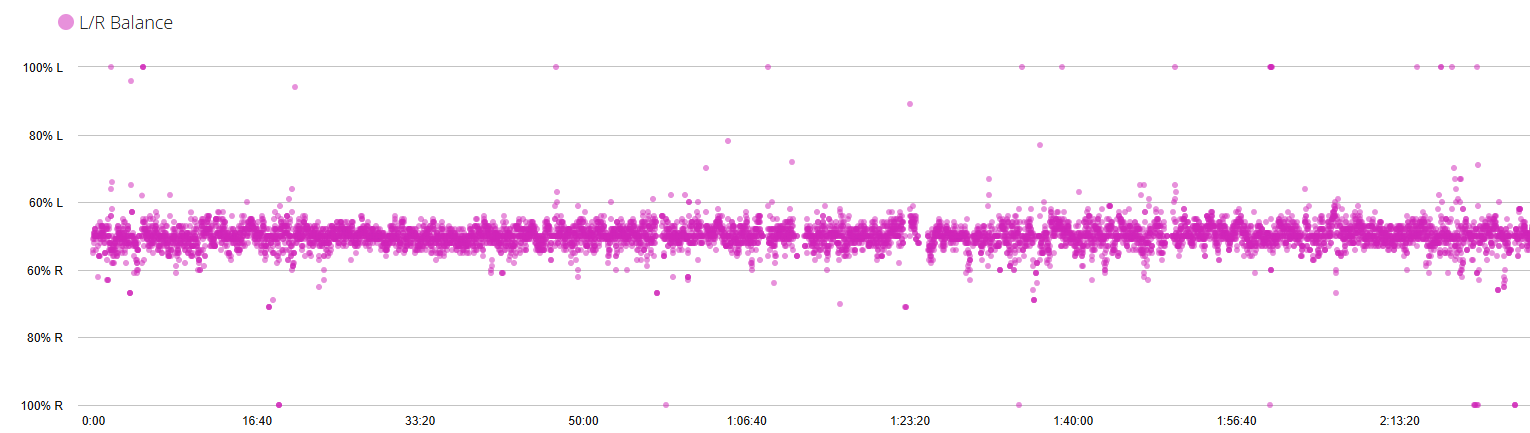
What does a dual-sided power meter give you?
A power meter can help improve pedalling smoothness and better understand your own effort characteristics. The dual-sided TWIN2 meter is particularly useful, offering advanced pedalling analysis features such as Cycling Dynamics and left/right leg balance.
Step 6. Train smart – choose the right training plan.
Once you are comfortable with power-based training, it is worth starting to ride according to a structured training plan. This makes it easier to use the power meter’s potential and to develop your fitness systematically.
Don’t overcomplicate it. At the beginning you don’t need to perform intricate workouts or analyse advanced training metrics; regular riding, a test of your current fitness (FTP) and your own sensations are enough.
You will find more information about training, the FTP test and power zones at this link.
Use AiTrainer
If you are looking for a ready-made solution, we encourage you to use the AiTrainer app. You can choose a training plan tailored to:
- your experience level,
- the time you have available for training,
- the type of bike you ride,
- your sporting goals.
When you buy an INPEAK power meter, you receive free access to AiTrainer for 2 months. This is a great opportunity to start power-based training following a plan tailored to your abilities and needs.
Summary
Correct installation, regular calibration and gradually getting used to the data from your power meter are the best way to begin training based on watts.
After completing all the steps described, your power meter will be ready to go, and you will be able to take full advantage of the possibilities of power-based training.
Good luck, ride safe, and see you at training!